Laying turf is, without a doubt, one of the quickest and most satisfying garden upgrades you can make. In fact, in just a single afternoon, a bare patch of soil can be completely transformed into a rich, green lawn. Better still, you don’t need to be a professional landscaper to achieve great results. Instead, with a little preparation, the right approach and a willingness to roll up your sleeves, you can do a great job yourself.
So, with that in mind, below we’ll guide you step by step through how to lay turf correctly. Along the way, we’ll also highlight the most common mistakes to avoid so that, in the end, you’re left with a healthy, vibrant lawn you’ll be proud to show off.
Step 1: Choose the Right Turf
To begin with, choosing the right turf is much like making any considered decision, the best option is ultimately the one that suits your garden conditions and your lifestyle.
Rather than simply picking the first variety you see, it’s important to think about how your lawn will be used and the environment it will grow in.
For example:
a) For busy households: If your lawn will regularly handle children, pets or frequent foot traffic, then opting for a hard-wearing turf variety is the smartest choice.
b) For shaded gardens: On the other hand, if your garden receives limited sunlight, you’ll want to look specifically for shade-tolerant blends that are designed to thrive in lower light conditions.
c) For a pristine finish: Alternatively, if achieving a polished, manicured appearance is your main priority, premium turf varieties can provide that smooth, high-end look.
With all that in mind, our turf offers the best of both worlds. Not only is it hard-wearing enough for busy gardens, but it is also shade-tolerant, making it a reliable and versatile choice for a wide range of outdoor spaces.
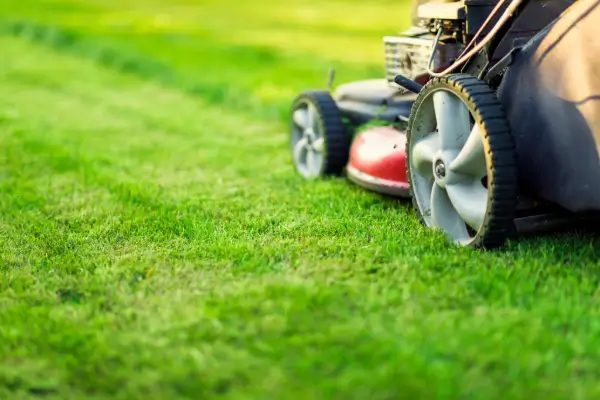
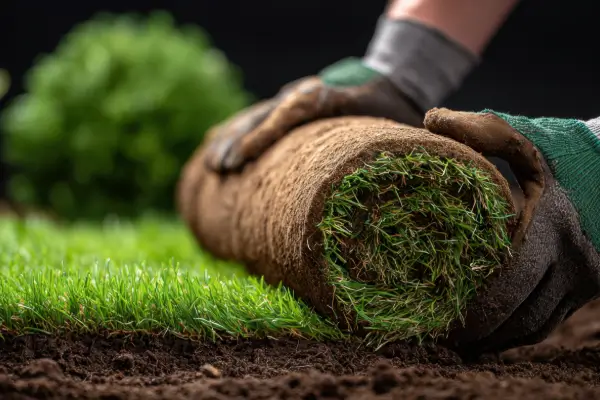
Step 2: Prep the Ground (The Part Everyone Wants to Skip — But Shouldn’t!)
Next comes the stage that many people are tempted to skip altogether. However, proper ground preparation is, quite simply, the difference between a lawn that makes you say “wow” and one that leaves you wondering, “why is it patchy?”
In other words, the effort you put in now will directly determine the results you see later. So, before you even think about laying the turf, make sure you focus on the following essentials:
Clear the area:
First and foremost, remove any weeds, stones, debris or old turf. Otherwise, these can interfere with root establishment and create uneven growth.
Improve your soil:
Next, add 5–10 cm of quality topsoil and rake it thoroughly until the surface is smooth and level. This not only improves drainage and nutrients but also creates an even base for the turf to sit on.
Check the firmness:
Finally, ensure the ground is firm but not compacted. Ideally, it should feel solid underfoot without being rock-hard. If it’s too soft, the turf may sink; if it’s too hard, roots will struggle to establish.
Ultimately, good soil preparation forms the foundation of a healthy, long-lasting lawn so although it may take extra time, it’s an investment you won’t regret.
Step 3: Lay the Turf Like a Pro (It’s Easier Than You Think)
Now comes the most satisfying part of the process, rolling out that fresh green carpet and watching your garden transform before your eyes.
Fortunately, while it may look technical, laying turf properly is actually much simpler than you might expect.
To ensure a professional-looking finish, follow these key steps:
Start along the straightest edge:
To begin with, position your first roll along the longest, straightest edge of your garden. This creates a clean guideline and helps keep the rest of the layout aligned.
Lay the rolls tightly together:
As you continue, make sure each roll is placed snugly against the next, with no gaps in between. Even small spaces can dry out or become visible as the turf settles.
Stagger the joins:
Rather than lining up the seams, stagger the joints in a brickwork pattern. This not only looks neater but also improves stability and prevents weak lines across the lawn.
Use a sharp knife for neat edges:
Finally, trim edges carefully with a sharp knife to achieve clean borders around paths, flowerbeds or patios.
At the same time, try to avoid stepping directly on the newly laid turf. If you need to move across it, place wooden boards down first to distribute your weight evenly and prevent indentations.
Step 4: Water, Water, Water (Your New Lawn’s Favourite Drink)
Once your turf is laid, the next, and arguably most crucial, step is watering. After all, your new lawn relies on consistent moisture to establish strong, healthy roots. Without it, even perfectly laid turf can struggle to thrive.
Therefore, during the first two weeks in particular, it’s essential to stay on top of your watering routine:
Water daily to keep the soil consistently moist. In hot or windy weather, you may need to water twice a day to prevent the turf from drying out.
Check beneath the edges regularly to ensure the soil underneath isn’t drying out, as surface moisture alone can be misleading.
Keep foot traffic to a minimum, since movement can disturb the turf before the roots have had a chance to anchor properly.
Over time, as the roots begin to establish, you’ll notice the turf becoming more secure. In fact, you’ll know it has properly rooted when you gently lift a corner and feel firm resistance. At that point, your lawn is well on its way to becoming fully established.
Step 5: Maintain Your New Masterpiece
Finally, once your turf has rooted and you can see it actively growing, it’s time to shift your focus to ongoing maintenance. After all, consistent care at this stage is what keeps your lawn looking thick, healthy, and vibrant in the long term.
As growth begins:
- Mow lightly when the grass reaches 5–7 cm. However, avoid cutting it too short too soon, as this can stress the young lawn.
- Keep the mower blades high for the first few cuts. Gradually lowering the height over time will encourage stronger, denser growth.
Feed the lawn after a couple of weeks to give it an added nutrient boost and support continued establishment.
Additionally, if you notice small gaps or need to tidy up edges and corners, sprinkling a little lawn seed can help blend those areas seamlessly into the rest of the turf. Over time, with the right care, your lawn will knit together into a smooth, uniform finish.
Common Mistakes to Avoid
As with any garden project, even small missteps can affect the final result. Therefore, being aware of the most common turf-laying mistakes can help you avoid unnecessary setbacks and ensure your lawn establishes properly from the start.
In particular, watch out for the following:
Leaving gaps between rolls, which can dry out quickly and become visible as the turf settles.
Laying turf on uneven ground, as this often leads to bumps, dips, and drainage problems later on.
Inconsistent watering, since both underwatering and overwatering can prevent strong root development.
Letting rolled turf sit too long before laying, which can cause it to dry out, overheat or deteriorate before installation.
By consciously avoiding these common pitfalls, you’ll significantly improve your chances of success and, as a result, you’ll be well on your way to enjoying a lawn you can truly be proud of.
Ready for the Garden You’ve Been Imagining?
Now that you know the steps involved, bringing your dream garden to life is more achievable than ever. After all, laying turf is surprisingly straightforward when you have the right tools, proper preparation, and, most importantly, high-quality products to work with.
So, when you’re ready to get started:
Order freshly harvested turf online to ensure maximum freshness -complete with fast, FREE delivery.
Choose premium topsoil to give your new lawn the strong, nutrient-rich foundation it needs from day one.
Ultimately, with the right approach and materials in place, your perfect lawn is only a few clicks away.